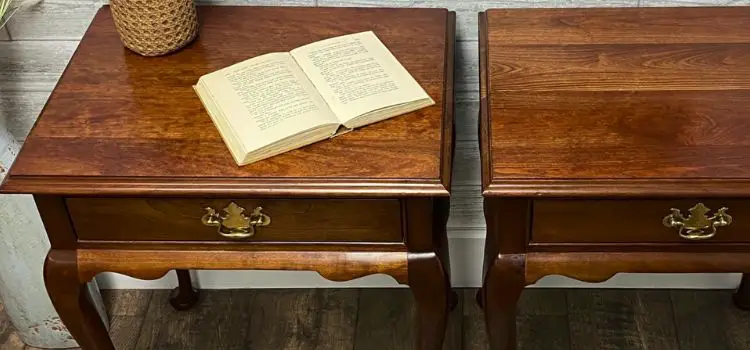
The Shot Answer Of How to Repaint Table Top? To repaint a tabletop, start by sanding the surface and applying an even coat of suitable paint. Choose a high-quality paint like ADVANCE Interior for a furniture-like finish on wood or laminate tables.
Repainting a tabletop can breathe new life into an old piece of furniture, transforming your space with minimal cost. By doing this do-it-yourself project, you can décor to match your style and room aesthetic. With the proper preparation and materials, even beginners can achieve professional-looking results.
The process involves cleaning, sanding, priming (if necessary), and painting with a color that complements your interior design. Repainting a tabletop is a rewarding and creative home improvement task, whether updating a family heirloom or revamping a thrift store find.
What Is Table Top Repainting?
Tabletop repainting involves:
- Sanding down the old finish.
- Priming.
- Applying new paint to refresh the look of your table.
This process enhances furniture’s durability and aesthetic appeal, giving it a new lease on life with a touch of your personal style.
Revamping your home decor doesn’t always call for a complete overhaul—sometimes, a simple touch-up can breathe new life into your space. Tabletop repainting is a prime example of this. It involves refreshing the surface of your table by applying a new coat of paint.
This is not just about aesthetics; it’s also about protecting and extending the life of your furniture. Repainting your table can be a rewarding DIY project, whether it’s scratched or worn out or you just fancy a change of colour.
The Benefits Of Repainting Your Table Top
Before diving into the how-to, let’s explore why repainting your tabletop is beneficial:
- Aesthetic Upgrade: Changing the colour or finish can dramatically alter the look and feel of a room.
- Surface Protection: A fresh coat of paint acts as a barrier against moisture and wear, extending the life of your table.
- Cost-Effectiveness: Repainting is a wallet-friendly way to update your interior design instead of purchasing new furniture.
Choosing The Right Paint For Your Table Top
Choosing the right paint is crucial for tabletop repainting, as it impacts your furniture’s appearance and durability. Here’s a quick guide to help you select the best option:
- For Wood Tables: Opt for a paint that adheres well to wooden surfaces and offers a hard finish, such as oil-based or latex paint.
- For Laminate Tables: Specialized laminate paints are available, or a good primer can make regular paint stick to laminate surfaces.
Preparing Your Table For Repainting
A perfect finish is mostly dependent on preparation. Here are the necessary steps:
- Cleaning: Remove all dirt and grime from the surface with a gentle cleanser.
- Sanding: Lightly sanding the tabletop will help the new paint adhere better. If you’re using chalk paint, you can skip this step.
- Priming: A primer will ensure an even base for the paint, which is especially important for tables with dark stains or uneven surfaces.
Applying The Paint
Now, the transformation begins:
- First Coat: Apply a thin, even layer of paint using a brush or roller. Be patient and let it dry completely.
- Second Coat: After the first layer is dry, assess whether a second coat is needed. If needed, apply it just as you did the first, ensuring even coverage.
Maintaining Your Repainted Table Top
To keep your repainted table looking its best, follow these maintenance tips:
- Regular Cleaning: Use a soft cloth and non-abrasive cleaner to keep the surface clean.
- Avoid Heat and Moisture: Protect the surface from hot dishes and spills with coasters and placemats.
- Touch-Ups: If the paint chips or scratches over time, a quick touch-up can restore the look.
READ MORE: Hardwood vs. Softwood: Which is Better for Your Next Project?
Why Should You Repaint Your Table Top?
Revitalizing your tabletop with a fresh coat of paint can transform your space, offering a cost-effective way to update your furniture’s look. Repainting a tabletop not only enhances its aesthetic appeal but also provides a protective layer, extending the life and durability of your table.
Reviving the heart of your home often starts with a simple yet transformative project like repainting a tabletop. The table is a central piece of furniture where life unfolds—from family meals to late-night conversations—and deserves a fresh look that reflects the care you put into your living space.
Let’s explore why painting your tabletop is not just an aesthetic decision but a practical home improvement decision.
Refresh Your Decor
Upgrading your home’s style can be as straightforward as repainting your tabletop. This simple change can:
- Introduce new colours: A different colour can completely alter the mood and style of a room.
- Tie in with current trends: Keeping up with design trends is easy with a coat of paint, allowing your furniture to stay modern and stylish.
Increase The Table’s Longevity
The durability of your furniture is paramount, and a fresh layer of paint does wonders for extending its life:
- Protect the surface: Paint is a barrier against scratches, stains, and everyday wear and tear.
- Enhance the wood’s natural beauty: A quality paint job can highlight your table’s wood grain and craftsmanship.
Personalize Your Space
Your home should reflect your personality, and what better way to express yourself than through the colours and finishes you choose for your furniture?
- Showcase your style: Choose a colour that complements your unique taste.
- Create a focal point: A bold colour can make your table the room’s centrepiece.
Save Money
Opting to repaint rather than replace your table top can be a savvy financial decision:
- Cost-effective: Painting is a budget-friendly alternative to buying new furniture.
- Increase furniture value: A well-executed paint job can boost the overall value of your table.
Eco-friendly Option
Repainting your table is suitable for your home and the environment. By refinishing rather than discarding, you contribute to a more sustainable lifestyle.
- Reduce waste: Keep your table out of the landfill.
- Promote upcycling: Transforming your existing furniture is an excellent example of upcycling in action.
Repainting your table top is a brilliant way to revitalize your space, extend the life of your furniture, and express your individuality—all while being mindful of your budget and the planet. With these compelling reasons, it’s clear that a new paint job can profoundly impact both the form and function of your table.
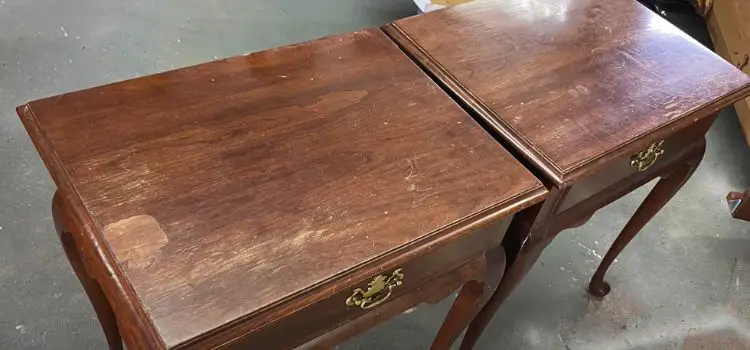
What Are The Signs That Your Table Top Needs Repainting?
Noticeable scratches and fading varnish on your tabletop indicate that it’s time for a refresh. Peeling paint or discoloration also signals the need for a new coat.
Revitalizing your living space can often start with anything as easy as applying a new layer of paint on an old tabletop. Over time, furniture surfaces can show signs of wear and tear that diminish their beauty and impact the overall look of your room.
Recognizing when to repaint your tabletop is the first step to restoring its former glory and enhancing your home’s aesthetic.
Fading And Discoloration
One of the most prominent indicators that your tabletop is due for a repaint is the presence of fading and discolouration. Here’s what to look out for:
- Sun Exposure: Continuous sunshine exposure can result in the colour of your tabletop to fade unevenly, leaving it looking washed out.
- Aged Finish: Older paint or stain can be yellow or dull over time, significantly affecting the table’s appearance.
Scratches And Surface Damage
Another telltale sign that it’s time to refresh your table top is the appearance of scratches and other surface damage. Consider these points:
- Daily Use Wear: Regular use can result in scratches, nicks, and dents that make the surface look rough and unkempt.
- Water Rings and Heat Marks: Unprotected exposure to hot dishes and moisture can leave behind unsightly marks that are difficult to remove without a complete repaint.
Paint Peeling Or Chipping
When the existing paint on your tabletop starts to peel or chip, it’s a clear signal that a new coat is needed. Here’s why this happens:
- Age of Paint: Over time, paint can lose its adhesion, leading to peeling or chipping that exposes the raw material beneath.
- Improper Application: Previous paint jobs done hastily or without proper surface preparation can result in a finish that only lasts for a while.
Uneven Or Rough Texture
A smooth and even surface is critical for a tabletop, not just for aesthetics but also for functionality. If you’re noticing these issues, it’s time for action:
- Grain Raising: The wood grain can rise due to moisture, leading to a rough texture that needs to be sanded and repainted.
- Cracking or Crazing: Fine lines or cracks in the finish, often due to temperature fluctuations or ageing, can make the surface feel uneven and unattractive.
Being on the lookout for these indicators, you can keep your tabletop pristine and ensure that it remains a centrepiece in your home for years. Whether it’s the sun’s rays dulling the finish or the everyday scrapes and spills that come with life, addressing these issues with a new add a fresh coat of painting to give your beloved table.
What Materials Do You Need To Repaint Your Table Top?
Revitalizing your tabletop requires specific materials, such as sandpaper for surface prep, a high-quality primer to ensure paint adhesion and durable paint designed for furniture. Don’t forget a sealant for lasting protection and a smooth finish.
Revitalizing your tabletop with a fresh coat of An unremarkable piece of furniture can be transformed with paint to a statement item that catches the eye. Gathering all the necessary materials before you start iis essential to guarantee a successful and seamless repaint job.
Doing this makes the process easier and helps achieve a professional-looking finish.
1. Sandpaper Or Sanding Block:
Starting with the correct grit of sandpaper is essential to preparing your tabletop for a new coat of paint:
- Fine-grit sandpaper: This is typically used to smooth the surface after a round of heavier sanding.
- Medium-grit sandpaper: Ideal for removing the old finish and creating a surface that paint can adhere to effectively.
2. Quality Paintbrushes And Rollers:
Choosing the correct brushes and rollers can significantly affect the finish of your paint job:
- Synthetic bristle brushes: These are perfect for use with water-based paints due to their smooth application.
- Foam rollers help achieve an even and smooth finish with minimal texture, which is especially important on a tabletop surface.
3. Primer:
A primer is a layer applied beforehand that offers more protection for the item being painted, improves paint endurance, and assures improved paint adhesion to the surface:
- Oil-based primer: It’s suitable for high-use areas as it seals the wood better and blocks stains.
- Water-based primer: It’s easier to clean up and quick-drying, so it’s a good choice if you’re using water-based paint.
4. Paint:
The choice of paint is critical to the final appearance and durability of your tabletop:
- Acrylic latex paint: Offers a durable finish and simple cleanup, which makes it a well-liked option for furniture.
- Oil-based paint: Known for its resilience, it’s an option for tabletops with a lot of wear and tear.
5. Protective Finish:
To ensure your tabletop withstands the test of time, a protective finish is a must:
- Polyurethane: Provides a durable, clear topcoat that protects the paint from scratches and stains.
- Polycrylic: A water-based protective coat that dries quickly and doesn’t yellow over time.
6. Miscellaneous Supplies:
Don’t forget the small yet significant accessories that aid in the painting process:
- Painter’s tape: Essential for protecting edges and creating clean lines.
- Drop cloths: Keep your workspace clean and prevent paint from spilling on the floor.
- Rags and sponges: Useful for wiping away dust and cleaning up any spills.
With this comprehensive list of materials, you can turn that worn-out tabletop into a vibrant centrepiece. Remember, the quality of your materials will often showin the caliber of the final output that you produce, so invest wisely and take the time to prep your workspace and materials before diving into the painting process.
What Type Of Paint Is Best For Table Tops?
Selecting the right paint for tabletops is crucial for durability and aesthetics. Oil-based paints or polyurethane varnishes are ideal for their hard-wearing properties and ease of maintenance, making them top choices for repainting table tops.
Repainting a tabletop can transform any dining area or workspace, giving it a fresh, personalized touch. Selecting the right type of paint is crucial for durability and the desired finish. Whether you’re aiming for a sleek, modern look or a cosy, rustic vibe, understanding the best paints for table tops is critical to achieving high-quality results.
Acrylic Paint
Acrylic paint is a versatile option for table tops, offering a balance between quality and usability:
- Ease of Use: Acrylic paint is water-based, so Applying and cleaning it up with soap and water is simple.
- Drying Time: It dries quickly, which is convenient if you want to complete a project soon.
- Finish Options: Available in various finishes from matte to glossy, acrylic allows for multiple looks suited to different decor styles.
Oil-based Paint
For table tops that endure frequent use, oil-based paints are an excellent choice:
- Durability: Known for their toughness, oil-based paints resist scratches and general wear and tear.
- Rich Finish: They tend to leave a hard, high-gloss finish, which looks professional and offers a higher level of protection against spills and stains.
- Curing Time: Although they take longer to dry and cure than acrylic paints, the result is a more durable and stable finish.
Choosing the right paint can elevate your tabletop from merely functional to a standout piece in your home or office. With each type of paint offering distinct benefits, consider your specific needs—such as the level of durability required and the desired aesthetic—to ensure your repainted table top looks great and lasts long.
READ MORE: How Long Does It Take Wood Stain to Dry?
What Are The Other Tools Required For Repainting?
Embarking on a tabletop repainting project requires more than just paint and brushes. Sandpaper, primer, and a clear sealant are essential for a smooth finish and long-lasting durability.
Essential Sanding Supplies
Before diving into the world of repainting, it’s crucial to prepare your tabletop with the right sanding supplies. Sanding creates a smooth base that ensures the new paint adheres properly and looks flawless. You’ll need a variety of sandpaper grits, starting using to get rid of the previous finish, use a coarser grit and working your way to a finer grit for a polished surface. To facilitate the procedure, use an electric sander or sanding block on your arms.
Protective Gear:
- Safety Glasses: Keep debris and dust out of your eyes generated during sanding and painting.
- Respirator Mask: Wear this mask to shield your lungs from harmful fumes, especially if you’re working in a less ventilated space.
- Gloves: Hand hygiene and chemical safety should be prioritized in paint removers and stains.
Quality Brushes And Rollers
A smooth, streak-free finish requires top-notch brushes and rollers. Invest in a good angled brush for those hard-to-reach areas and a foam roller for an even coat on larger surfaces. These tools can make or break the final look of your repainted table top, so choose wisely.
Additional Necessities:
- Painter’s Tape: You don’t want to be painted for clean edges and protecting parts of the table.
- Drop Cloths: To safeguard your floors and furniture from spills and splatters.
- Paint Tray: Essential for holding paint and helping to roll out excess before application.
- Primer: A must-have for ensuring your topcoat of paint adheres correctly and lasts longer.
Cleanup Tools
Post-painting cleanup is just as important as the preparation. Keep mineral spirits or paint thinner to clean oil-based paints off your brushes. For water-based paints, warm, soapy water will do the trick. Also, have some rags and a waste container nearby to dispose of used materials promptly and safely.
Embracing the task of repainting a tabletop can be both fun and rewarding. With the right tools and some know-how, you’re on your way to breathing new life into an old piece of furniture. Preparation is critical, and the proper tools will make your project successful.
Let’s get that table from drab to fab!
How To Prepare Your Table Top For Repainting?
Revitalize your tabletop by thoroughly cleaning it to remove any grime or residue. Follow up by sanding down the surface to prepare a smooth surface for the upcoming paint job, ensuring better adhesion and a flawless finish.
Reviving the look of your dining room or kitchen can often start with a simple yet significant project: repainting a tabletop. Whether it’s a family heirloom or a garage sale find, giving a table a fresh coat of paint can transform it from a piece of furniture into a centrepiece.
That being said, in order to guarantee a seamless, lasting finish before the brush touches the wood. Let’s examine the steps necessary to prepare your tabletop for a new lease on life.
Assessing The Current Finish And Material
Understanding the type of material and the current state of your tabletop is crucial:
- Determine the material: Is your table solid wood, veneer, or synthetic laminate? This will influence the preparation process.
- Inspect for damage: Seek out any indications of deterioration, such as scratches, dents, or water rings.
Cleaning The Table Top
A clean surface is essential before any sanding or priming. Dirt, grease, and old polish can interfere with paint adhesion.
- Remove all items: Clear the table of any objects and debris.
- Use a gentle cleaner: A mixture of warm water and mild dish soap works well. Steer clear of strong chemicals that could harm the wood.
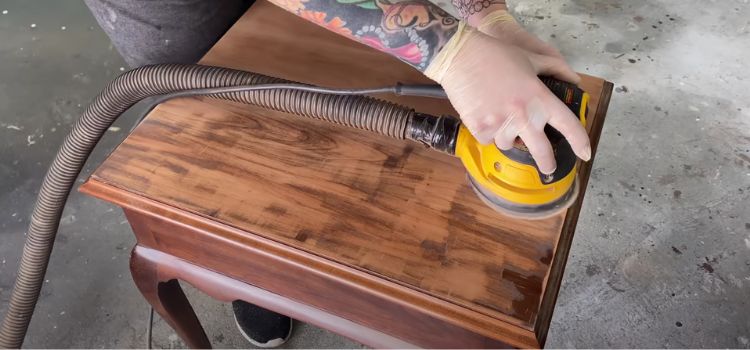
Sanding The Surface
Sanding is pivotal in prepping your tabletop for a new coat of paint. It assists in preparing a rough surface so that paint would stick to it and eliminates any residual finish or blemishes.
- Choose the correct grit: Start with a medium-grit sandpaper and finish with a fine-grit for a smooth texture.
- Sand evenly: Work in the direction of the grain to avoid scratches, and don’t forget the edges and any intricate details.
Repairing Imperfections
Your tabletop might have some battle scars that need attention before painting:
- Fill in the gaps: Use wood filler for any cracks or holes, then sand the area smoothly once dry.
- Address loose joints or peeling veneer: Tighten any screws or re-glue peeling sections.
Priming The Table Top
Priming prepares the surface for a perfect coat of paint, especially when dealing with dark or stained wood:
- Select an appropriate primer: Choose one suitable for your table’s material and the paint you’ll use.
- Apply evenly: Apply a roller or brush to coat the entire surface, and let it dry per the manufacturer’s instructions.
Taping Off Areas
If you’re not planning to paint the entire table, you’ll need to protect certain parts:
- Apply painter’s tape: Carefully remove any areas you want to keep paint-free, such as the legs or underside.
- Press firmly: Ensure the tape is secure to prevent the paint from bleeding.
Following these steps will create the ideal canvas for your new tabletop colour. Remember, patience and attention to detail in the preparation stage can make all the difference in achieving a professional-looking finish that stands the test of time.
Now, grab your supplies, and let’s turn that old table into a masterpiece!
What Are The Steps To Sanding?
Sanding is a crucial step before repainting a tabletop to ensure paint adherence and a smooth finish. Start by selecting the appropriate grit sandpaper, then evenly sand the entire surface to remove old paint or varnish. This prepares the table for a flawless application of new paint.
Repainting a tabletop can transform an old piece of furniture into a fresh, appealing centrepiece for your room. The secret to an impeccable, seamless finish is proper preparation, especially when sanding. This process removes old paint and creates a smooth surface that helps new paint adhere better.
Let’s dive into the essential steps for sanding your tabletop effectively.
Gather Your Sanding Materials
Before you begin, Having the appropriate equipment and supplies on available is essential to guarantee the sanding process is efficient and effective:
- Sanding Block or Electric Sander: Choose based on your tabletop size and comfort level.
- Sandpaper:To begin removing old, coarse grit, finishes and gradually move to finer grits for a smooth finish.
- Safety Gear: Dust masks and safety goggles are essential to protect yourself from dust and debris.
- Cleaning Cloth: This is used to wipe down the surface after sanding.
Step-by-step Sanding Process
Sanding can seem daunting, but breaking it down into manageable steps can simplify the process:
- Preparation: Remove any objects from the table. Ensure the area is well-ventilated.
- Coarse Sanding: Use coarse-grit sandpaper to strip away old paint or varnish. To prevent scratches, move your sandpaper in towards of the grain of the wood.
- Intermediate Sanding: Switch to medium-grit sandpaper to refine the surface even further and eliminate any last blemishes.
- Fine Sanding: Finish with fine-grit sandpaper to achieve a completely smooth surface. This step is crucial for the best painting results.
By carefully following these steps, you prepare your tabletop not just for painting but for a finish that looks professional and lasts long. Remember, the quality of your sanding job will directly affect the result of your painting project, so take your time to do it right.
READ MORE: How to Make a Wooden Box Waterproof: DIY Mastery
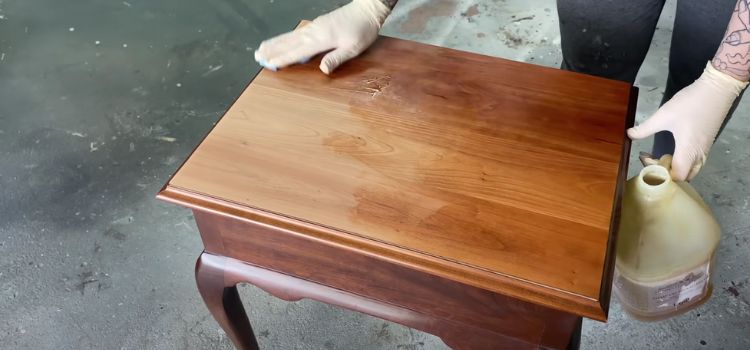
How To Clean The Table Top Before Painting?
Preparing your tabletop for repainting is critical to ensure a smooth finish. Start by carefully cleaning the surface in order to eliminate dirt, grease, or residue. A gentle yet effective cleaning solution can make all the difference in prepping your table for its transformation.
Preparing Your Workspace
Before starting the cleaning process, it’s crucial to set up a proper workspace. This initial step ensures safety and efficiency throughout your project. Choose a well-ventilated area, preferably outdoors or in a garage with open doors and windows. Cover the surrounding space with drop cloths or old newspapers to protect against spills or drips.
Gather all necessary cleaning supplies and tools to be within reach when needed.
How To Clean The Table Top Before Painting
Cleaning the table top is a vital step in the repainting process. It’s not just about dusting off crumbs; you’re setting the stage for a flawless finish. Here’s how to do it right:
- Dusting: Begin by wiping down the surfaceusing To eliminate any loose dust or dirt, use a clean, dry cloth free of lint.
- Degreasing: Oils and grime can interfere with paint adhesion, so apply a degreaser using a sponge or cloth and thoroughly wipe down the surface.
- Sanding: Light sanding provides a “tooth” for the new paint to grip onto. Use fine-grit sandpaper and gently scuff up the tabletop.
- Cleaning solution: Combine a small amount of dish soap with warm water. Wipe off the mixture after dipping a towel so it’s damp, and wipe down the table to remove any residual sanding dust and soap scum.
- Final wipe: Rinse the soap from the tabletop with a clean, damp cloth. Then, dry it thoroughly with a fresh cloth to prevent any watermarks.
Assessing The Table Top Condition
Once the tabletop is clean, inspect it for damage or irregularities. Look for cracks, chips, or areas where the previous finish is peeling. If these problems are resolved today, there will be a more professional and lasting finish.
If repairs are needed, Apply wood filler to any cracks and let it cure in accordance with the manufacturer’s recommendations before proceeding to paint.
Selecting The Right Cleaning Products
Choosing the correct cleaning products is essential to avoid damage to your tabletop and to ensure that the new paint adheres appropriately:
- Gentle cleaners: Opt for mild detergents that are not abrasive, as harsh chemicals can damage the wood.
- Soft cloths: Use microfiber or other soft cloths to prevent scratching the surface while cleaning.
- Quality sandpaper: Select fine-grit sandpaper that will smooth the surface without creating deep scratches that could show through the paint.
By meticulously cleaning your tabletop and preparing your workspace, you’re laying the groundwork for a repainting job that will look professional and stand the test of time. Keep your sentences concise, voice active, and instructions clear to help your readers achieve the best results for their table top repainting projects.
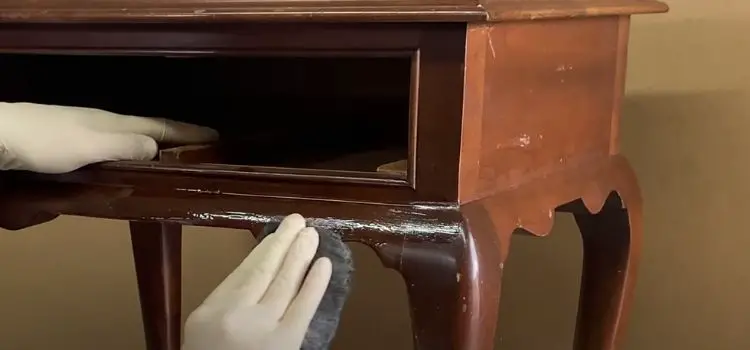
What Are The Tips For Taping And Protecting The Edges?
Protecting table edges during repainting is crucial for a professional finish. Use quality painter’s tape to shield the edges and avoid paint bleed. Carefully press down the tape for a secure seal, ensuring crisp, clean lines for your revamped tabletop.
Reviving a tabletop’s charm applying a brand-new coat of paint can be a satisfying do-it-yourself task. Before you dive into the realm of brushes and hues, it’s crucial to master the art of taping and protecting the edges.
This step ensures a crisp, professional finish and keeps your work looking sharp and clean. Let’s explore some invaluable tips for executing this process flawlessly.
Choose The Right Tape For The Job
Choosing the appropriate tape is the cornerstone of edge protection. Not all recordings are created equal, and selecting the wrong one can lead to bleed-through or damage to the finish.
- Painter’s tape: This is specifically designed for painting jobs. It adheres well and is removed cleanly without leaving residue or damaging the surface.
- Width matters: Opt for a wider tape to give yourself a more generous margin of error. It’s easier to work with and provides better coverage.
Prep The Edges Before Taping
Preparing the edges is just as crucial as the taping itself. Here’s how to ensure the tape adheres appropriately and provides the necessary protection.
- Clean thoroughly: Wipe the edges with a damp cloth to remove dust and debris. The tape won’t stick to a dirty surface.
- Dry completely: Allow the edges to dry thoroughly before applying tape. Moisture can prevent the tape from adhering and can seep under the edges.
Apply Tape With Precision
Applying tape might seem straightforward, but a careful approach can significantly affect the final outcome.
- Apply in short sections: Work in small increments to maintain control and ensure straight lines. This technique prevents the tape from stretching and warping.
- Smooth down the edges: Use a flat tool or your fingers to press down the edges of the tape firmly. This action helps prevent paint from seeping underneath.
Protect Adjacent Surfaces
Sometimes, you need more than tape to protect the surrounding areas of the tabletop.
- Drop cloths or plastic sheeting: Cover larger areas to safeguard them from accidental splatters and spills.
- Overlap tape with the coverings: Ensure the tape overlaps with the drop cloths or plastic. This creates a continuous barrier against paint.
Remove Tape At The Right Time
The timing of tape removal is pivotal in achieving a clean edge.
- Please wait for the right moment: To prevent your tape from removing any dried paint, when the paint is still a little tacky, remove it.
- Pull at an angle: Gently pull the tape back on itself at a 45-degree angle for a neat finish.
By meticulously taping and protecting the edges of your tabletop, you set the stage for a painting job that’s rewarding and radiates professional quality. Remember, the devil is in the details; these tips are your blueprint for success.
Let’s make that tabletop shine with a new lease on life!
How To Repaint Your Table Top?
Revamping your tabletop with a fresh coat of paint can transform any room. Start by sanding the surface to ensure the new paint adheres well. Next, apply a primer followed by your choice of paint, using smooth, even strokes for a flawless finish.
Revamping your home decor can be a fulfilling DIY project, and repainting a tabletop is a perfect start. Transforming a tired piece of furniture into a chic statement requires some know-how, the right materials, and a bit of elbow grease.
Let’s dive into how you can give that tabletop a fresh look.
Choosing The Right Paint And Tools
Before embarking on your repainting journey, Choosing the right paint and tools is essential for a polished finish:
- Type of paint: Choose a paint that suits the table’s material and usage. Acrylic or oil-based paints are durable options for wooden tables, whereas laminate surfaces may require a specific bonding primer.
- Brushes and rollers: For a smooth finish, invest in high-quality brushes and foam rollers. The right tools can prevent brush marks and uneven texture.
Preparing The Table Top
The key to a flawless paint job is in the preparation. Ensuring the table top is ready for its the difference is enormous with a fresh coat of paint:
- Cleaning: Begin thoroughly to remove dirt, grime, or residues. Usually, a light detergent diluted with water works well.
- Sanding: Sand the surface gently to produce a key to which the new paint will adhere. Sanding is essential for previously painted or varnished surfaces to remove the glossy finish.
Applying Primer
A primer acts as a foundation for the paint, offering a uniform base and ensuring better adhesion:
Priming is an essential step, significantly if you’re changing the table top’s colour drastically or working with a porous material. A good primer will hide imperfections and provide a smooth canvas for the topcoat.
Painting The Table Top
Now comes the exciting part – adding colour to your tabletop. Here’s how to get the best results:
- First coat: Apply the first layer of paint using long, even strokes. This initial coat may not completely cover the table, but it sets the stage for subsequent layers.
- Drying time: Let the initial layer of paint dry fully before adding a second. If you rush this process, the finish may not be up to par.
Finishing Touches
To protect your newly painted table top and ensure it stands the test of time, a sealant is your final step:
A sealant or topcoat will protect the paint from scratches, stains, and water damage. It’s the secret to a durable and long-lasting finish.
By following these steps,An antique piece of furniture will get fresh life from you, and your room will have a unique touch. Recall that the details are what make a work of art, so take your time and enjoy transforming your tabletop into a piece you’re proud of.
READ MORE: How to Make a Wooden Box Waterproof: DIY Mastery
What Are The Techniques For Painting Table Tops?
Revamping a tabletop requires selecting the right paint and meticulously prepping the surface. Sanding smooths the top for better paint adhesion, while priming creates a receptive base.
Revamping your tabletop with a fresh coat of paint can transform your space, adding a touch of personal flair and modernity. Whether you’re looking to refresh an antique heirloom or upcycle a garage sale find, painting a tabletop requires specific techniques to ensure a smooth, lasting finish.
Let’s dive into the methods that will help you achieve the perfect painted tabletop.
Choosing The Right Paint
Selecting the appropriate paint for your tabletop is crucial:
- Type of table top: Use paint that adheres well and can handle wear and tear, such as furniture paint or high-quality acrylic latex paint for wooden tables.
- Desired finish: Matte, satin, and gloss finishes are available. Shinier finishes are typically easier to clean and more resilient.
- Colour selection: Consider the room’s decor and the table’s usage. Darker colours may show fewer marks, while lighter colours can brighten a space.
Preparing The Surface
Before you start painting, proper preparation is key:
- Clean the tabletop thoroughly: Remove any dirt, grime, Any oils that can make it difficult for the paint to adhere properly.
- Sand the surface if necessary: If the table top has a previous finish or is rough, smooth the base by sanding it down.
- Wipe away sanding dust: Use a tack cloth or damp rag to ensure the surface is immaculate before applying any paint.
Applying Primer
Paint is applied to a homogenous surface thanks to primer:
Priming the table top helps the paint has improved adhesion and can require fewer applications needed for full coverage. It’s essential to paint over a darker colour or if the original surface is stained or varnished.
Painting Techniques
The method you use to apply the paint can significantly affect the outcome:
- Brush application: Use a high-quality brush for smaller areas or detailed work. Brush in the direction of the grain for wood surfaces.
- Roller application: A foam roller can provide a smooth, even coat for larger surfaces without brush marks.
- Spraying: In the event that you own a paint sprayer, it can give you the most professional-looking finish. Make sure to practice using scrap material first to perfect your technique.
Drying And Curing
After painting, give your tabletop, ample time to dry:
- Pay attention to the drying times specified by the paint manufacturer.
- Avoid using the table until the paint has fully cured, which can take longer than the initial drying. This will ensure the durability of your finish.
Adding A Protective Topcoat
A top coat can safeguard your hard work:
- Select a topcoat appropriate for your paint type and the expected wear of the table.
- Apply according to the product’s directions for the best protection.
By following these techniques, your repainted tabletop can be transformed into a focal point in your house, reflecting your style and craftsmanship. Remember to take your time with each step, and don’t hesitate to consult with paint professionals if you have specific questions about your project.
How Many Coats Of Paint Should You Apply?
Revitalizing a tabletop with a fresh coat of paint typically requires at least two coats. Depending on the paint’s opacity and the surface condition, ensuring a smooth, durable finish on your repainted tabletop may call for additional layers.
Applying a new coat of paint to your tabletop will revitalize your area, transforming an old piece into the centrepiece of your room. The key to a professional-looking finish lies in applying the correct number of paint coats.
So, let’s examine the number of layers necessary to achieve that sleek, vibrant finish that will stand the test of time.
The Foundation: Primer Coats
Before you even think about your colour coats, starting with a good primer is essential for longevity and adhesion:
- Primer importance: It contributes to the uniformity of the paint’s adhesion surface, improving durability and an even colour finish.
- Number of primer coats: One to two coats of primer should suffice. If you cover a dark or vibrant table top with lighter paint, you might need an additional primer layer to prevent the old colour from bleeding.
Color Layers: Determining The Number Of Paint Coats
Now, for the main event: painting your tabletop. Here’s how to decide on the number of color coats:
- Coverage quality: The first coat often acts as a base layer and might not cover the primer entirely. Look for any unevenness or spots where the primer shows through to gauge if a second coat is needed.
- Paint type and color: Some paints cover more opaquely than others. Lighter colors typically need more coats than darker ones for full coverage.
- Desired finish: Two to three coats are usually recommended for a deep, rich color and a finish that withstands wear and tear.
Do not forget to allow every coat to completely dry before adding the next, and sand lightly between coats for the smoothest finish. The right number of coats ensures a stunning, lasting result, making your repainted table top a conversation piece for years to come.
What Are The Tips For Achieving A Smooth Finish?
Achieving a smooth finish on a repainted tabletop begins with thorough sanding to remove old finishes and create a uniform surface. Ensure each coat of paint or varnish is evenly applied and allow adequate drying time for a professional, sleek appearance.
Revamping your tabletop with a fresh coat of paint can transform its entire look. Achieving a perfectly smooth finish requires a bit of know-how and the right technique. Let’s dive into the details to ensure your repainting project leaves your table looking sleek and professional.
Preparing The Surface
A smooth finish starts with meticulous surface preparation. The highest quality paint won’t adhere correctly, proper prep and imperfections will be magnified. Here’s what you need to do:
- Cleaning the surface: Make sure the tabletop is free from dust, grease, and any old flaky paint. A gentle but thorough cleaning with a degreaser or mild detergent sets the stage for a flawless finish.
- Sanding: Lightly sanding the surface with fine-grit sandpaper helps to create a texture that the new paint can grip onto. Aim for an even, matte surface, free of glossiness from the old finish.
- Repairing flaws: Fill in any dents, scratches, or gouges with wood filler, then smooth the area once it’s dry.
Choosing The Right Tools And Materials
The tools and materials you choose can significantly impact the quality of your finish. Here’s a balanced approach:
- Selecting the paint: Opt for a paint formulated for furniture or cabinets that offers durability and a smooth finish. High-quality acrylic or enamel paints are excellent choices.
- Picking the right brushes and rollers: Use high-quality brushes with fine bristles to reduce brush marks. Foam rollers can also provide a smooth application without the texture that traditional rollers might leave.
Applying The Paint
When it’s time to paint, your technique will play a pivotal role in achieving that smooth, professional appearance:
- Apply thin coats: It’s tempting to slather on thick layers of paint, but this can lead to drips and a bumpy surface. Thin, even coats are key, allowing each layer to dry completely before applying the next.
- Use a gentle touch: Avoid overworking the paint. Lay it down smoothly and leave it be; too much brushwork can create streaks.
Finishing With A Protective Coat
Once your paint has cured, it’s crucial to protect your hard work:
- Choose a compatible sealant: A polyacrylic or polyurethane topcoat will guard against scratches and wear, ensuring your tabletop remains smooth and resilient.
- Apply the sealant with care: Use a clean brush or foam roller and apply the sealant with the same attention to detail as the paint. This final layer is your safeguard and worth the extra attention.
Following these steps will give your tabletop a stunning, smooth finish and extend its lifespan, allowing you to enjoy your handiwork for years to come. Patience and attention to detail are your best friends in any repainting project.
How To Finish And Protect Your Newly Repainted TableTop?
Revitalize your table top with a fresh coat of paint to ensure it’s stunning and durable. Seal your masterpiece with a robust finish to shield against daily wear and tear, locking in the color and protecting the wood beneath.
Repainting your table top can completely transform the look of your space, adding a fresh vibe to any room. Once you’ve chosen your colour and applied your paint, the next crucial step is ensuring your tabletop is both beautiful and durable.
Let’s explore the best practices for finishing and protecting your newly repainted tabletop.
Choose The Right Finish
Selecting the appropriate finish for your tabletop is essential to protect it from scratches, heat, and water damage. Here are a few options:
- Polyurethane: Offers a hard, durable finish and comes in various sheens, from matte to glossy.
- Polycrylic: This water-based protective coat goes on clear and dries faster than polyurethane.
- Wax: Provides a natural finish and works well for antique-style looks, though it may require more frequent reapplication.
Apply The Finish Correctly
Proper finish application is just as important as the type of finish you choose. Here’s how to do it effectively:
- Clean the surface: Ensure the painted surface is completely clean and dust-free.
- Put on many light coats:As opposed to one heavy coat, apply several thin coats, allowing each coat to dry as the manufacturer recommends.
These actions will assist you in having a seamless, professional-looking finish that will keep your table looking great for years. Recall that the secret to a project’s success is carefully preparing and applying the proper techniques. By using these suggestions, you might relish your gorgeous repainted table top without worrying about wear and tear.
READ MORE: Hardwood vs. Softwood: Which is Better for Your Next Project?
What Are The Options For Finishing The Table Top?
Exploring tabletop finishing options is essential after repainting. Choose from varnishes for durability, oils for a natural look, or lacquers for a high-gloss finish to protect and enhance your freshly painted surface.
A tabletop makeover with a new coat of paint can revitalize a space, setting the stage for delightful dinners or creative sessions. Before diving into the painting process, it’s crucial to choose the right finishing touch that enhances the beauty of your table and ensures its durability.
Let’s explore the finishing options that will make your tabletop both inviting and resilient.
Polyurethane Finish
Polyurethane is a popular choice for table tops due to its protective qualities:
- Durability: This finish shields your table from scratches, spills as well as normal use-related wear and tear.
- Aesthetics: It provides a beautiful sheen ranging from matte to glossy, complementing the paint colour beneath.
- Ease of Maintenance: Polyurethane is easy to clean, needing to be cleaned occasionally with a moist cloth to maintain a spotless finish.
Polyurethane comes in water- and oil-based varieties, each with pros and cons. Water-based polyurethane dries quickly and has less odour, while oil-based versions add a warm amber glow to the wood.
Wax Finish
A wax finish offers an entirely different approach to sealing your painted table top:
- Natural Look: Wax maintains the natural look of the paint, providing a soft, velvety finish without the gloss.
- Repairability: It’s simple to reapply or touch up areas that have become worn over time.
- Tactile Quality: The wax creates a smooth, tactile surface that feels organic and warm.
However, remember that wax requires more maintenance than polyurethane and may need to be reapplied more frequently to retain its protective qualities.
Choosing the right finish for your tabletop can significantly impact its appearance and longevity. Consider your lifestyle, the level of use your table will see, and your aesthetic preferences when making your decision. Whether you opt for the robust protection of polyurethane or the natural charm of a wax finish, the result will be a table top that’s both functional and stylish.
How To Maintain And Protect The Repainted Table Top?
Preserve your repainted table top by applying a clear sealant to shield it from scratches and wear. Regular dusting and using coasters will prevent water rings and preserve the fresh paint’s vibrancy.
Revamping your tabletop with a fresh coat of paint can completely transform its look, making it a centrepiece of your room once again. But the work doesn’t stop once the last coat dries. For your table top to remain immaculate and endure frequent usage, proper care and maintenance are essential.
Let’s explore how to keep your repainted table top in tip-top condition.
Regular Cleaning
The first step in maintaining your repainted table top is to clean it regularly. It’s not just about aesthetics; it’s about longevity:
- Use a soft cloth: A microfiber cloth is gentle on the paint and effective in picking up dust and spills.
- Avoid harsh chemicals: Stick to mild soap and water to prevent paint deterioration.
- Immediate spill cleanup: To prevent stains, wipe up any spills as soon as they happen.
Utilize Protective Coatings
Applying a coat of protection once the paint has completely dried will help insulate the surface from abrasions and wear:
- Select the right sealant: A polyurethane or polyacrylic sealant can provide a durable finish.
- Follow application instructions: Apply as directed for the best results, usually with a fine-bristle brush or foam applicator.
- Reapply as needed: Over time, the sealant may wear thin. Be prepared to reapply it to maintain protection.
Avoid Direct Sunlight
Sunlight can be a painted tabletop’s worst enemy:
- Position wisely: Keep your table away from direct sunlight to prevent the paint from fading.
- Use window treatments: The quantity of UV light that reaches the table can be reduced with the use of drapes or blinds.
Use Table Mats And Coasters
Incorporating mats and coasters into your table-setting routine is a simple yet effective habit:
- Protection from heat: Hot dishes can damage the paint and sealant, so always use mats.
- Prevent water rings: Coasters are essential for keeping moisture from seeping into the paint.
Be Mindful Of Sharp Objects
Finally, being cautious with sharp objects will keep your tabletop looking smooth and scratch-free:
- Avoid cutting directly on the surface: Cutlery should be used to shield the paint.
- Lift, don’t drag: When moving items on the table, lift them to avoid scratches.
By following these guidelines, your repainted table top will look beautiful and be well-protected for years to come. Remember, regular care is the secret to preserving any furniture’s finish, and your tabletop is no exception.
Embrace these habits, and you’ll enjoy that ‘like new’ look for longer.
Frequently Asked Questions (FAQs) About How to Repaint Table Top: Everything You Need to Know
What Kind Of Paint Do You Use For A Table Top?
For painting a tabletop, use a durable paint like chalk paint, acrylic, or a polyurethane-based option for resilience. These ensure a smooth, lasting finish suitable for frequent use.
Can You Paint Over A Table Without Sanding?
You can paint over a table without sanding using chalk paint or specially formulated furniture paint. These adhere well and create a durable finish.
Can You Refinish Just The Top Of A Table?
Yes, you can refinish just the top of a table by sanding off the old finish and applying a new one to refresh its look.
How To Paint A Wooden Table Top?
To paint a wooden table top:
1. Start by sanding the surface smooth.
2. Wipe it clean to remove dust.
3. To guarantee uniform paint application, use a primer.
Once dry, brush on your chosen paint color. Finish with a clear sealant for protection.
What Type Of Paint Is Best For Table Tops?
The best type of paint for table tops is typically a high-quality, durable option like ADVANCE Interior paint. This paint provides a furniture-like finish and is suitable for both wood and laminate surfaces.
Conclusion
With a little imagination and work, you can drastically change the look of your room by painting a tabletop. This guide has walked you through all the necessary steps, from prepping to the final coat. Recall that the quality of paint you select and the level of preparation are the keys to a perfect finish.
Whether you’re updating an old favorite or thrift store find, these tips will ensure a beautiful, long-lasting result. Happy painting, and enjoy your refreshed furniture piece!
As an Amazon Associate, I earn from qualifying purchases